It is my turn to present a tutorial over at
CATCH THE BUG CHALLENGE BLOG.
It has been a wonderful three months as a Guest Designer.
And today, I am delighted to share with you a birthday collection that I have put together for my grand-daughter's birthday.
I found this darling memory box at Micheals. It is only about a half inch deep. There are so many things that you could do with with this memory box. I choose to make a birthday collection of my grand-daughter's yearly pictures.


For the images, I used BBrat Ballerina, Bugaboo Brat School-Crayon Girl and Kid Pocket Topper-Wavy Hair Girl.
The yellow tags will be used to add her birth date, birth weight etc.
Add embellishments as you desire.

I couldn't stop there, so I made this sweet little gift box for my grand-daughter too. I am not going to do a tutorial on this box. However, I found an amazing blog that has all kinds of cute boxes. You can find it here.
Kirstens Blogg

I went a little crazy on making all these cute little gifts for my grand-daugher. I had to have a birthday card to go alone with all the other little items I had made for her. She loves being a ballerina. So I thought this theme would be perfect for her.
I added glitter to the ballerina's skirt.
Next, a Photo Album

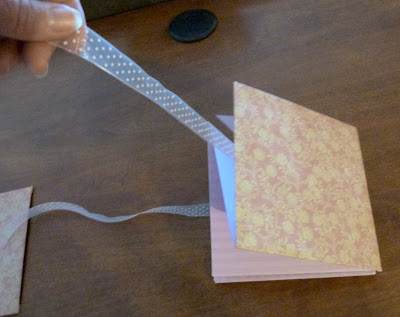
Use three 12" X 12" card designer paper or card stock. Fold in half both directions. Then fold once from one point to the other. You will have two corners that are 6 inch squares on each sheet of card stock. Glue or tape the center piece face down to the other two squares face up. The three pieces will fold into an accordian style photo album. Glue or tape your finshed 6 inch square tops that has been covered in designer paper as shown above. Be sure to attach your ribbon on both top and bottom before adding to the top and bottom of the photo album. Ribbon will have to be added on both sides of the album because it will open on both sides. You will have 4 pieces of ribbon. Two on each side. Decorate the top of your album however you would like it.

To decorate the cake pop or cupcake holder, cut your designer paper in two inch strips the length of the bottom part of the pot. Cover with Mod Podge in sections. Put some mod podge on the pot and some on the paper you are adding to the pot. Smooth out until the paper adheres to the pot. Let dry. Measure the width of the top part of the pot and add your paper the same way. After you have covered the pot with designer paper, add one more coat of mod podge. Let dry before adding your images and embellishments.
I hope you enjoy all of these birthday creations. If you have any questions, please email me.
Thanks for stopping by.
Thank you for taking the time to visit my blog. I appreciate your comments!


ADORABLE!!! Every project is simply adorable Nancy!!! You should have heard me ooooo, and awwww as I scrolled down to each picture! WOW!!
ReplyDeleteLinda
Oh Wow Nancy, Linda is right this is totally adorable what a wonderful project birthday gift for your granddaughter this is so cute she'll just love it because I know I do. I bet you had loads of fun making it as well that's why you could stop. LOL
ReplyDeleteReally brilliant one very lucky little girl.
Hugs
Kathie
xox
Fabulous projects. Your granddaughter is beautiful.
ReplyDeleteWow what wonderful keepsakes you have created for her to keep forever! Each one is just fantastic in it's own way!
ReplyDeletePeace & Luv,
Jeannie
Love the ptojects you have created!! I've been eying that MEmory Box at Michael's... I might just be picking one up soon!! Love, Love, Love this post and all your creations!! Hugs to you - Sally
ReplyDelete